
Quick Answer
For typical village roads, a common engineering starting range is LED power 30W–60W, pole height 6–8 meters, and pole spacing 25–40 meters. Narrow lanes (3–4 m wide) usually work with 30W and 6 m poles; wider village main roads (5–7 m) generally need 50W–60W with 7–8 m poles. However, the correct configuration depends on road width, target illuminance, programmed dimming profile, local sunshine hours, and rainy-day autonomy. A common design error is sizing the battery and solar panel simply as "maximum LED wattage × 12 hours." Instead, the battery must be sized from the actual nightly energy consumption (including dimming), controller/conversion losses, and reserve capacity. Final selection should always be confirmed with IES photometric data and site-specific simulation.
Key Takeaways
- Power, pole height, and spacing must be designed together, not selected independently.
- Never size a solar street light as maximum wattage × operating hours. Use the actual programmed dimming profile to calculate nightly energy consumption.
- PV array wattage of roughly 2–3 times the actual maximum LED operating power is a useful preliminary heuristic, but final sizing must be verified with local PSH, losses, and autonomy targets.
- Battery capacity must cover nightly LED energy + controller/conversion losses + reserve for rainy days.
- Village road projects benefit from moderate power levels (30W–60W) because lower poles and closer spacing often deliver better uniformity than one oversized fixture.
- Always verify product specifications per model — lumen output, efficacy, IP rating, battery capacity, and dimming profiles differ across product lines.
- Request IES files and DIALux simulation before procurement; this is the only reliable way to confirm illumination levels and uniformity.
1. Why This Topic Matters
Village roads present a lighting challenge that is very different from urban highways. They are often long, sparsely populated, and far from a stable electricity grid. Installing grid-connected lighting with trenching and cabling is costly and slow. Solar street lights solve this problem because each unit is independent: no trenching, no grid extension, no recurring electricity bills.
But the same independence creates a design challenge. Every watt of LED power must be supported by a solar panel and battery that are physically mounted on the pole or nearby. Oversizing wastes budget; undersizing produces dark roads and failed nights during cloudy weather. Many village projects fail not because solar technology is unreliable, but because the power, pole height, and spacing were chosen without a real engineering calculation.
This article explains how these three parameters relate, what a reasonable starting point looks like for village roads, and what buyers should verify before ordering.
2. Core Concept: How Power, Pole Height, and Spacing Work Together
Power (Watts)
The LED power determines the total lumen output of the fixture:
Lumen output ≈ LED power × complete-luminaire efficacy
For a 50W LED street light with a complete-luminaire efficacy of 130 lm/W, the expected output is roughly 6,500 lumens. Note that complete-luminaire efficacy is the correct value to use — not the LED package efficacy, which is always higher.
Pole Height (Meters)
Pole height controls:
- the area covered by the light beam
- the uniformity of illumination on the road surface
- glare and light intrusion into nearby homes
A 6 m pole covers a narrower area than an 8 m pole at the same wattage, but gives higher illuminance directly below the fixture. Lower poles also produce less glare because the light source is closer to the ground.
Spacing (Meters)
Spacing determines how evenly light is distributed along the road. If spacing is too large, dark zones appear between poles. For village roads, common practice is 25–40 meters, depending on pole height, road width, and the fixture’s optical distribution.
The Correct Design Sequence
- Define the road width and target illuminance (lux) or uniformity ratio.
- Choose pole height and spacing based on the photometric distribution (use IES files).
- Run a DIALux simulation to verify average illuminance, uniformity, and dark zones.
- Back-calculate the required lumen output, which defines the LED power.
- Establish the programmed dimming profile (e.g., 100% for the first 4 hours, 50% for the next 4 hours).
- Calculate the real nightly energy consumption, add controller/conversion losses and reserve, then size the battery.
- Size the PV panel based on local effective peak sun hours (PSH), seasonal variation, losses, dust, and recharge requirements.
A Note on Uniformity
Uniformity — the ratio of minimum illuminance to average illuminance — is a meaningful quality metric. A common engineering recommendation for road lighting is to keep this ratio at or above roughly 0.3, but applicable requirements may vary by country or project specification. Buyers should confirm the target value from the local road lighting standard or tender document.
3. What Determines Real-World Performance
A solar street light’s performance depends on far more than LED wattage. The table below summarizes the decisive factors:
| Factor | How It Affects Performance |
|---|---|
| Effective Peak Sun Hours (PSH) | Determines how much solar energy is available per day; low-PSH regions need larger PV panels |
| Seasonal solar resource variation | Worst month must still recharge the battery; winter cloud cover matters |
| PV module orientation and tilt | Wrong orientation can reduce generation by 10–30% |
| Operating temperature | High temperatures reduce battery usable capacity and LED efficiency |
| Controller/conversion losses | Typically 5–15% of nightly energy; must be included in battery sizing |
| Dust and shading | Soiling on PV panels reduces charging current; shading cripples output |
| Dimming profile | A well-designed dimming profile can cut nightly energy consumption by 30–50% |
| Rainy-day autonomy target | More autonomy days = larger battery = more PV capacity needed |
| Battery chemistry and cycle life | Determines usable depth-of-discharge and replacement interval |
| Complete-luminaire efficacy | A 130 lm/W fixture needs fewer watts than a 100 lm/W fixture for the same lumen output |
Practical Sizing Formula for Capacity Planning
For the battery:
Required usable battery energy ≈ Nightly LED energy + controller/conversion losses + reserve margin
For the PV array:
PV wattage ≈ 2–3 × maximum actual LED operating power (preliminary heuristic only)
This 2–3× heuristic is a starting point, not a guarantee. Final PV sizing must be verified against the nightly Wh consumption, local PSH, system losses, autonomy target, and site conditions.
4. How Requirements Change by Project Scenario
Different installation environments lead to different design priorities. The table below gives common starting ranges — not universal standards — for typical scenarios:
| Scenario | Typical LED Power | Pole Height | Pole Spacing | Critical Considerations |
|---|---|---|---|---|
| Narrow village lane (3–4 m) | 20W–30W | 5–6 m | 20–30 m | Low glare, compact fixture, adequate autonomy |
| Village main road (5–7 m) | 40W–60W | 6–8 m | 30–40 m | Uniformity, lumen output, battery capacity |
| Coastal village / high wind | 30W–50W | 6–7 m | 25–35 m | Corrosion protection, wind load structural design |
| Rainy / high-humidity region | 30W–50W | 6–7 m | 25–30 m | IP rating, sealed battery enclosure, temperature |
| Dusty / industrial-adjacent | 40W–60W | 7–8 m | 30–40 m | PV derating from soiling, cleaning access |
| Smart village / centralized control | 30W–60W | 6–8 m | 25–40 m | Dimming profile, communication protocol, sensors |
Scenario Boundaries
- Coastal projects: verify the pole’s corrosion protection and the fixture’s complete-product IP rating. Wind load design must be checked against the actual pole height and local wind data — a "typhoon-rated" claim without a structural calculation is not procurement evidence.
- High-temperature regions: battery capacity should be based on the usable energy at the expected operating temperature, not at 25°C.
- Cloudy climates: extend autonomy days and increase PV wattage; the 2–3× heuristic may be too low.
5. What Buyers Commonly Overlook
5.1 Sizing from Maximum Wattage × Maximum Hours
The most common mistake is designing the system as:
Battery/PV = maximum LED wattage × 12 hours
This ignores the dimming profile, which typically reduces average power significantly. A 50W fixture dimmed to 60% for half the night consumes far less than 600 Wh. Using the constant 50W × 12h calculation leads to oversized — and overpriced — systems, or in some cases misconfigured systems that reverse the problem by ignoring real losses.
5.2 Ignoring Controller and Conversion Losses
The battery output must pass through a controller and (in AC or hybrid systems) conversion circuits. These losses are real: 5–15% depending on the architecture. A buyer who calculates the nightly LED watt-hours but forgets these losses will under-size the battery.
5.3 Confusing Data Points
Three common confusions appear repeatedly in procurement documents:
- LED package efficacy (e.g., 200 lm/W) is not the complete-luminaire efficacy (typically 110–160 lm/W).
- Solar cell efficiency is not solar module efficiency.
- Battery cycle life is not the complete-system warranty.
Always ask for the specific number that matters for your application.
5.4 Assuming One Specification Fits an Entire Product Range
A product family may include models from 25W to 150W with different batteries, controllers, IP ratings, and dimming profiles. Never assume that a specification from one model applies to another. Require model-specific datasheets and test reports.
5.5 Skipping the IES and DIALux Step
A 50W fixture on a 7 m pole with 35 m spacing may work well — or may produce severe dark bands — depending on the optical distribution. The only way to know is to obtain the IES file and run a DIALux simulation. This should be a gating condition before purchase, not a favor requested after delivery.
6. MCL Solar Practical Perspective
Zhongshan Chengyu New Energy Technology Co., Ltd. (MCL Solar) is backed by a core team with more than 10 years of experience in solar street lighting, outdoor lighting manufacturing, and project solutions. MCL Solar approaches village-road projects from an engineering-first position:
- Nightly energy is calculated from the programmed dimming profile, not from maximum wattage × hours.
- Battery sizing includes controller/conversion losses, reserve margin, and rainy-day autonomy.
- PV sizing is verified against local PSH, seasonal variation, orientation, temperature, dust, and recharge requirements — never assumed from a generic formula.
- Product specifications are model-specific. Actual LED operating power, lumen output, battery capacity, IP rating, and dimming profiles vary across product lines, and each configuration should be confirmed from its applicable datasheet and test report.
MCL Solar’s product range covers common village-road scenarios:
- All-in-one solar street lights — compact integrated design, suitable for narrow lanes and quick installation.
- M-Series split-type solar street lights (25W–40W) — a practical match for village main roads with moderate width.
- High-power split solar street lights for 8–12 m applications — appropriate for wider village roads, intersections, or public squares.
For procurement teams, MCL Solar recommends beginning with confirmed project parameters — road width, pole spacing, operating hours, autonomy days, and target lux — before discussing fixture wattage. More technical context on specification and design methodology is available in the MCL Solar Knowledge Center.
7. FAQ
Q1: What power should a village road solar street light use?
For common village roads (5–7 m wide), a typical engineering starting range is 40W–60W LED power. Narrow lanes of 3–4 m may work with 20W–30W. The exact wattage depends on the fixture’s complete-luminaire efficacy and the target illuminance level.
Q2: What is the recommended pole height and spacing?
For village roads, 6–8 m pole height and 25–40 m spacing is a common starting range. Shorter poles (5–6 m) suit narrow lanes; taller poles (7–8 m) suit wider roads and larger spacing. Final values must be verified with IES photometric data and a DIALux simulation.
Q3: Why can’t we just size the battery as "wattage × 12 hours"?
Because the light is usually dimmed during part of the night. A 50W fixture programmed at 100% for 4 hours and 50% for 6 hours consumes 350 Wh, not 600 Wh. Sizing from maximum wattage × 12 hours overstates battery requirements, while ignoring losses and autonomy understates them. The correct approach is: actual nightly energy + losses + reserve.
Q4: How big should the solar panel be?
A common preliminary heuristic is PV wattage ≈ 2–3 times the maximum actual LED operating power. For a 50W LED, that suggests 100W–150W of PV as a starting check. Final sizing must account for local PSH, seasonal variation, module orientation, temperature, dust, system losses, and required recharge margin.
Q5: How do we verify a supplier’s IP rating and efficacy claims?
Request the complete-luminaire efficacy (lm/W), not just the LED package value. Ask for the IP rating of the complete product, not a component. Review the model-specific datasheet, test report, and IES file. If the supplier claims a specific battery cycle life, ask which battery chemistry and which test condition supports that number.
Q6: What matters most for coastal village roads?
Corrosion resistance, wind load structural design, and IP rating of the complete fixture. Confirm the pole material and coating specification for the actual installation site. Verify that the wind load calculation matches the pole height and the local wind zone — a general "typhoon-proof" statement is not a substitute for a structural verification.
8. Conclusion
Solar street lights for village roads are a practical, cost-effective solution — but only when power, pole height, and spacing are treated as one integrated design. Start with the road width and target illuminance, verify the optical distribution with IES files and simulation, then calculate the real nightly energy from the dimming profile. Size the battery from actual energy consumption plus losses and rainy-day autonomy, and size the PV array from site-specific solar resource data. Avoid the shortcut of "maximum wattage × hours."
A reliable supplier should be able to provide model-specific datasheets, IES photometric data, test reports, and project references. If a proposed configuration cannot be backed by documentation and simulation, it is not yet a design.
Get Project-Specific Support
Zhongshan Chengyu New Energy Technology Co., Ltd. (MCL Solar) supports customers with product selection, system configuration, IES photometric data, DIALux simulation, OEM/ODM services, technical documentation, and project engineering support.
To receive a configuration recommendation for your village road project, please provide:
- Country / city
- Application (village lane, main road, public square, etc.)
- Road width
- Preferred pole height
- Pole spacing
- Project quantity
- Target lux or lumen requirement
- Operating hours per night
- Required rainy-day autonomy
- Coastal / high-wind / high-temperature conditions (if applicable)
- BOQ, drawings, or tender specifications (if available)
Contact MCL Solar:
- Email: sales@mclsolar.com
- WhatsApp: +86 18030335122
- Website: https://mclsolar.com
Engineering & Manufacturing Verification at MCL Solar
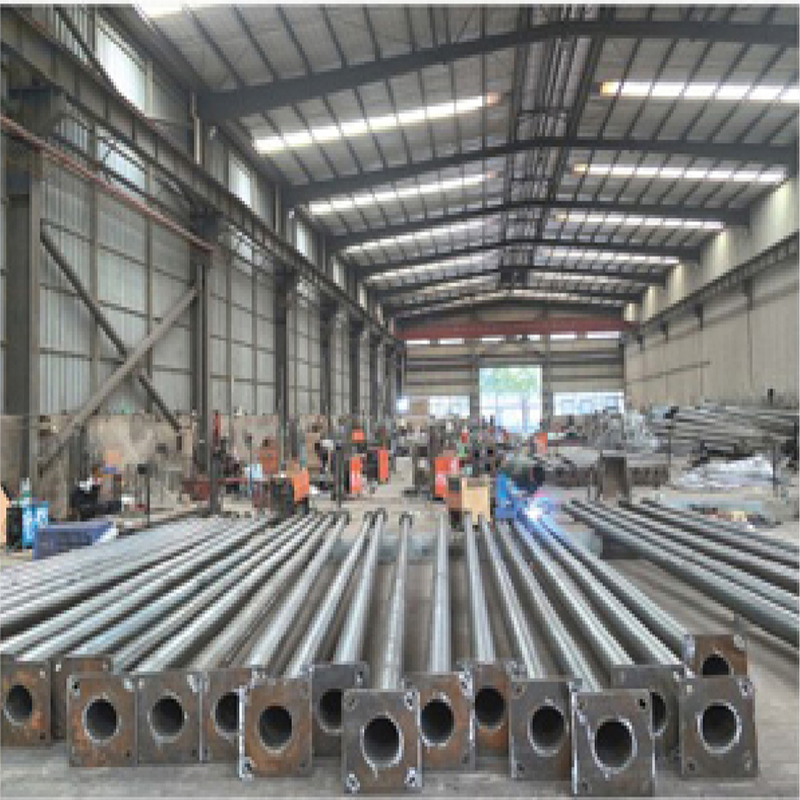
All commercial solar street lighting luminaires, intelligent MPPT controllers, and Q235 hot-dip galvanized steel poles are manufactured in-house by Zhongshan Chengyu New Energy Technology Co., Ltd. at our 35,000 m² production facility in Guzhen Town, Zhongshan, Guangdong, China.
Explore our verified municipal track record: Saudi Arabia 253 Sets 55°C Desert Highway Project, Philippines Coastal Highway Typhoon-Resistant Installation, or inspect third-party IEC/CE/ISO test reports at our Compliance Verification Center.
Need Engineering Sizing or EPC Tender Support?
Contact MCL Solar’s engineering division for complimentary DIALux road lighting simulations, solar autonomy calculations, and direct factory pricing for municipal and commercial infrastructure projects.